SpringBoot入門 vol.14:編集と削除機能を追加しよう
完成画面
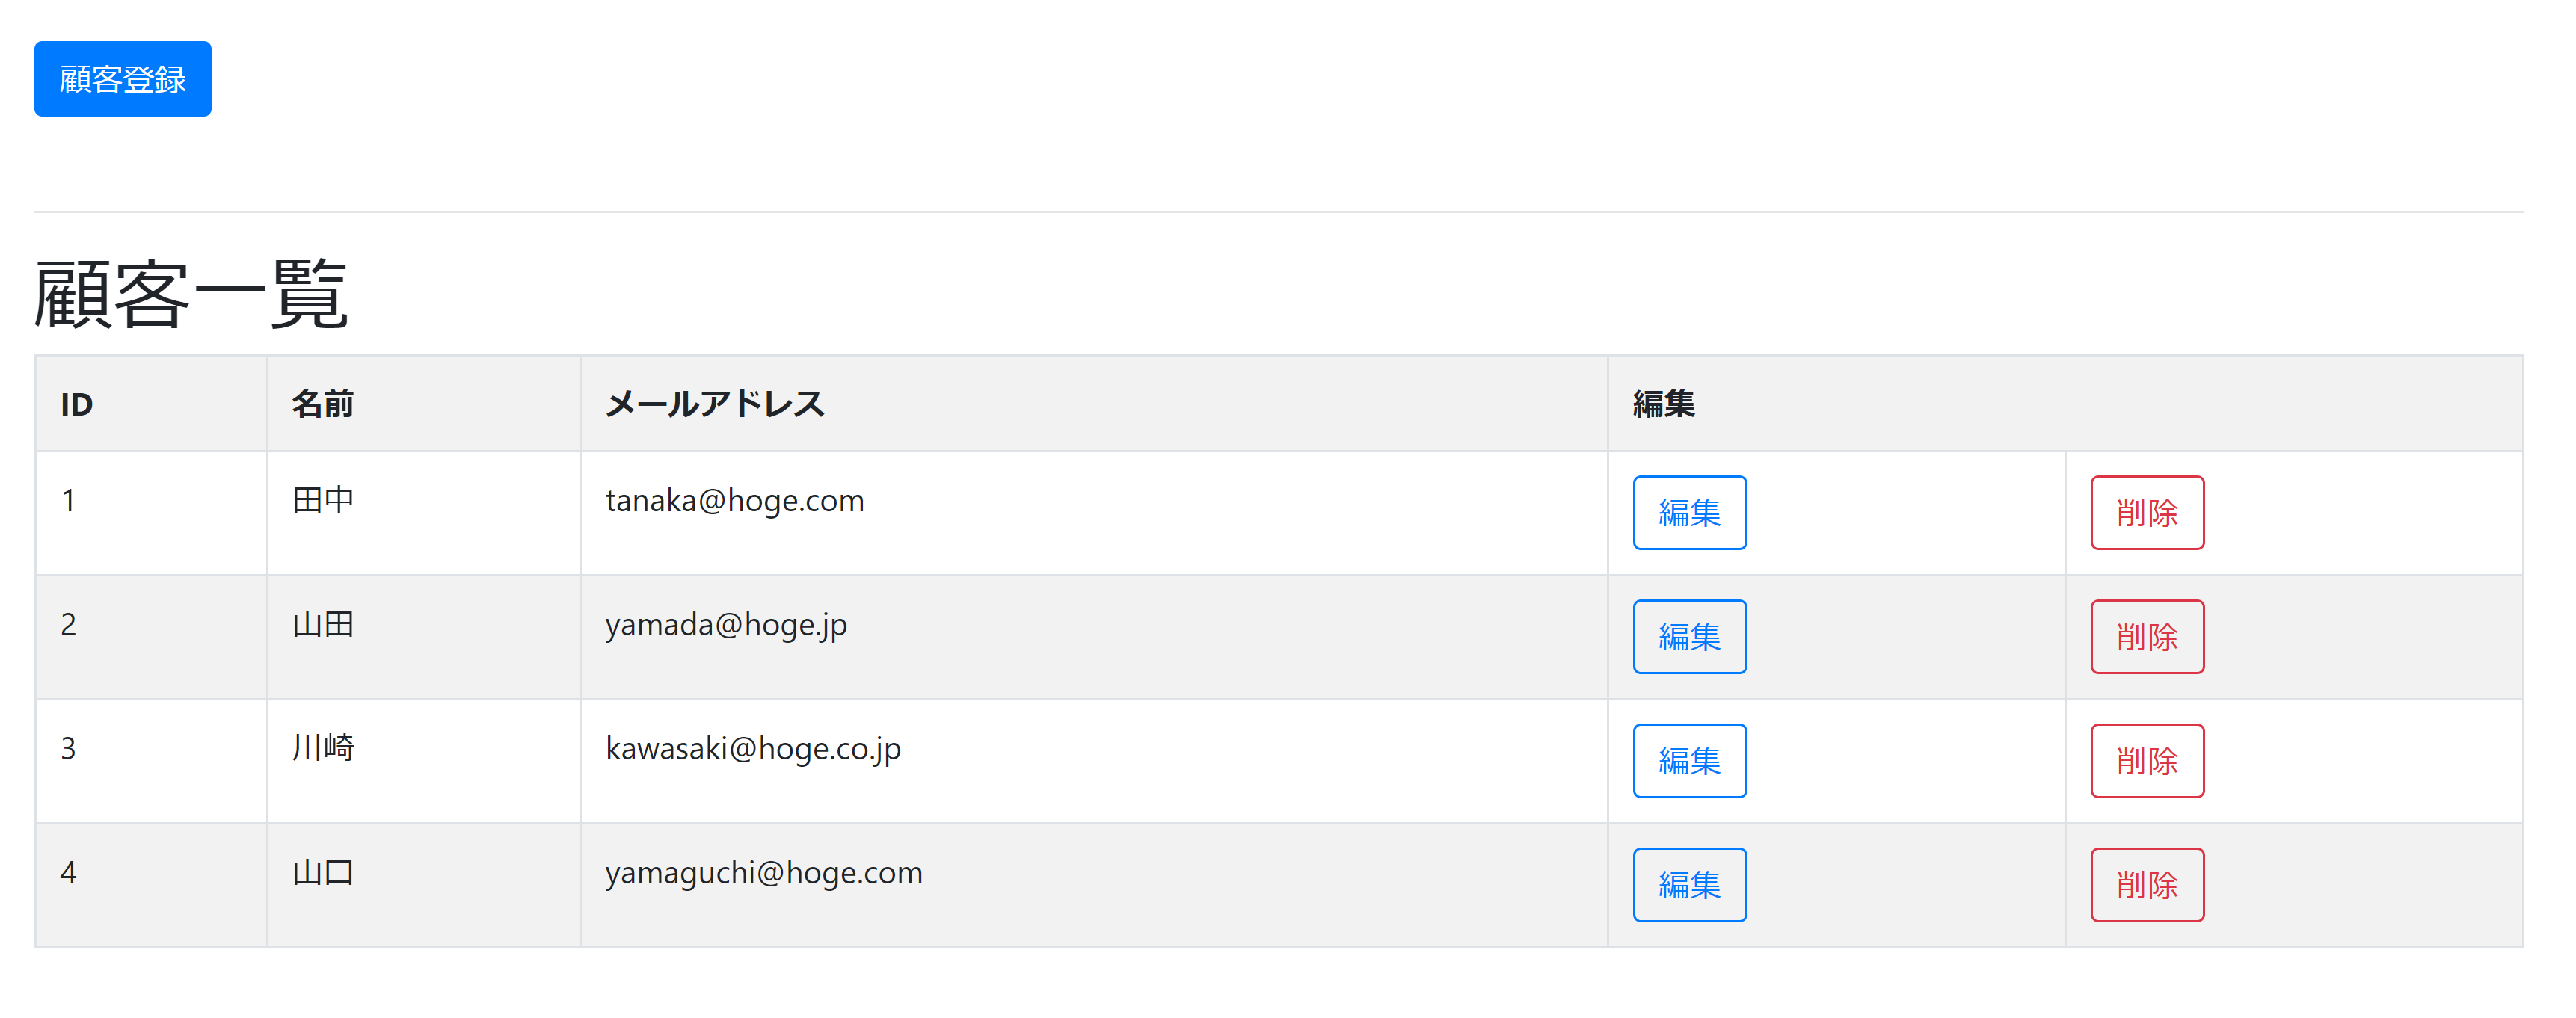
①顧客一覧画面(list.html)に編集・削除ボタンの追加
<!DOCTYPE html>
<html xmlns:th="http://www.thymeleaf.org">
<head>
<meta charset="UTF-8">
<link rel="stylesheet" th:href="@{/webjars/bootstrap/4.3.1/css/bootstrap.min.css}">
<link rel="stylesheet" th:href="@{/css/styles.css}" href="/css/styles.css">
<title>顧客一覧</title>
</head>
<body>
    <div class="container">
        <div class="my-5">
        <a class="btn btn-primary" th:href="@{/create}">顧客登録</a>
        </div>
        <hr>
        <h1 class="my-2">顧客一覧</h1>
        <table class="table table-bordered table-striped">
            <tr>
                <th>ID</th>
                <th>名前</th>
                <th>メールアドレス</th>
                <!-- 追記1 -->
                <!-- ポイント1 -->
                <th colspan="2">編集</th>
            </tr>
            <tr th:each="customer : ${customers}">
                <td th:text="${customer.id}"></td>
                <td th:text="${customer.name}"></td>
                <td th:text="${customer.email}"></td>
                <!-- 追記2 -->
                <td>
                    <form th:action="@{/edit}" method="post">
                        <input type="submit" class="btn btn-outline-primary" name="edit" value="編集">
                        <!-- ポイント1 -->
                        <input type="hidden" name="id" th:value="${customer.id}">
                    </form>
                </td>
                <td>
                    <form th:action="@{/edit}" method="post">
                        <input type="submit" class="btn btn-outline-danger" name="delete" value="削除">
                        <input type="hidden" name="id" th:value="${customer.id}">
                    </form>
                </td>
            </tr>
        </table>
    </div>
    <script th:src="@{/webjars/jquery/3.4.1/jquery.min.js}"></script>
    <script th:src="@{/webjars/bootstrap/4.3.1/js/bootstrap.min.js}"></script>
</body>
</html>
【追記1】
<th colspan="2">編集</th>【ポイント】
1.2列(編集と削除)を結合
【追記2】
<!-- 追記2 -->
<td>
    <form th:action="@{/edit}" method="post">
        <!-- ポイント1 -->
        <input type="submit" class="btn btn-outline-primary" name="edit" value="編集">
        <!-- ポイント2 -->
        <input type="hidden" name="id" th:value="${customer.id}">
    </form>
</td>
<td>
    <form th:action="@{/edit}" method="post">
        <!-- ポイント1 -->
        <input type="submit" class="btn btn-outline-danger" name="delete" value="削除">
        <!-- ポイント2 -->
        <input type="hidden" name="id" th:value="${customer.id}">
    </form>
</td>
【ポイント】
1.「name="edit"」、「name="delete"」
同じフォームの為、name属性に「edit」、「delete」を付与してどちらのボタンが押されたかを区別している
2.「th:value="${customer.id}"」で対象顧客の「ID」を送信している
②コントローラークラス(CustomerController.java)に編集画面への遷移を追記
@Controller
public class CustomerController {
    @Autowired
    CustomerService customerService;

            .
            .
            .

    //追記
    //ポイント1
    @PostMapping(path = "edit", params = "edit")
    //ポイント2
    String edit(@RequestParam Integer id, @ModelAttribute CustomerForm customerForm) {
        //ポイント3
        Optional<Customer> customerOpt = customerService.selectById(id);
        //ポイント4
        Customer customer = customerOpt.get();
        //ポイント5
        BeanUtils.copyProperties(customer, customerForm);
        return "edit";
    }
【ポイント】
1.@PostMapping(path = "パス", params = "Formで付与したname属性")
・path = "パス"
「@PostMapping」、「@GetMapping」でパス以外のパラメーターを記述する場合はパスであることを明示
・params = "Formで付与したname属性"
2.@RequestParam 型 変数
リクエストパラメーターをマッピング
「リクエストパラメーター」と「変数名」は一致させる
3.customerService.selectById(id)
「ID」を元に対象顧客をselect
4.Optional型.get()
Optional型の値を取り出し、Customer型に代入
5.BeanUtils.copyProperties(customer, customerForm);
編集対象の「名前」と「メールアドレス」を編集画面に渡す
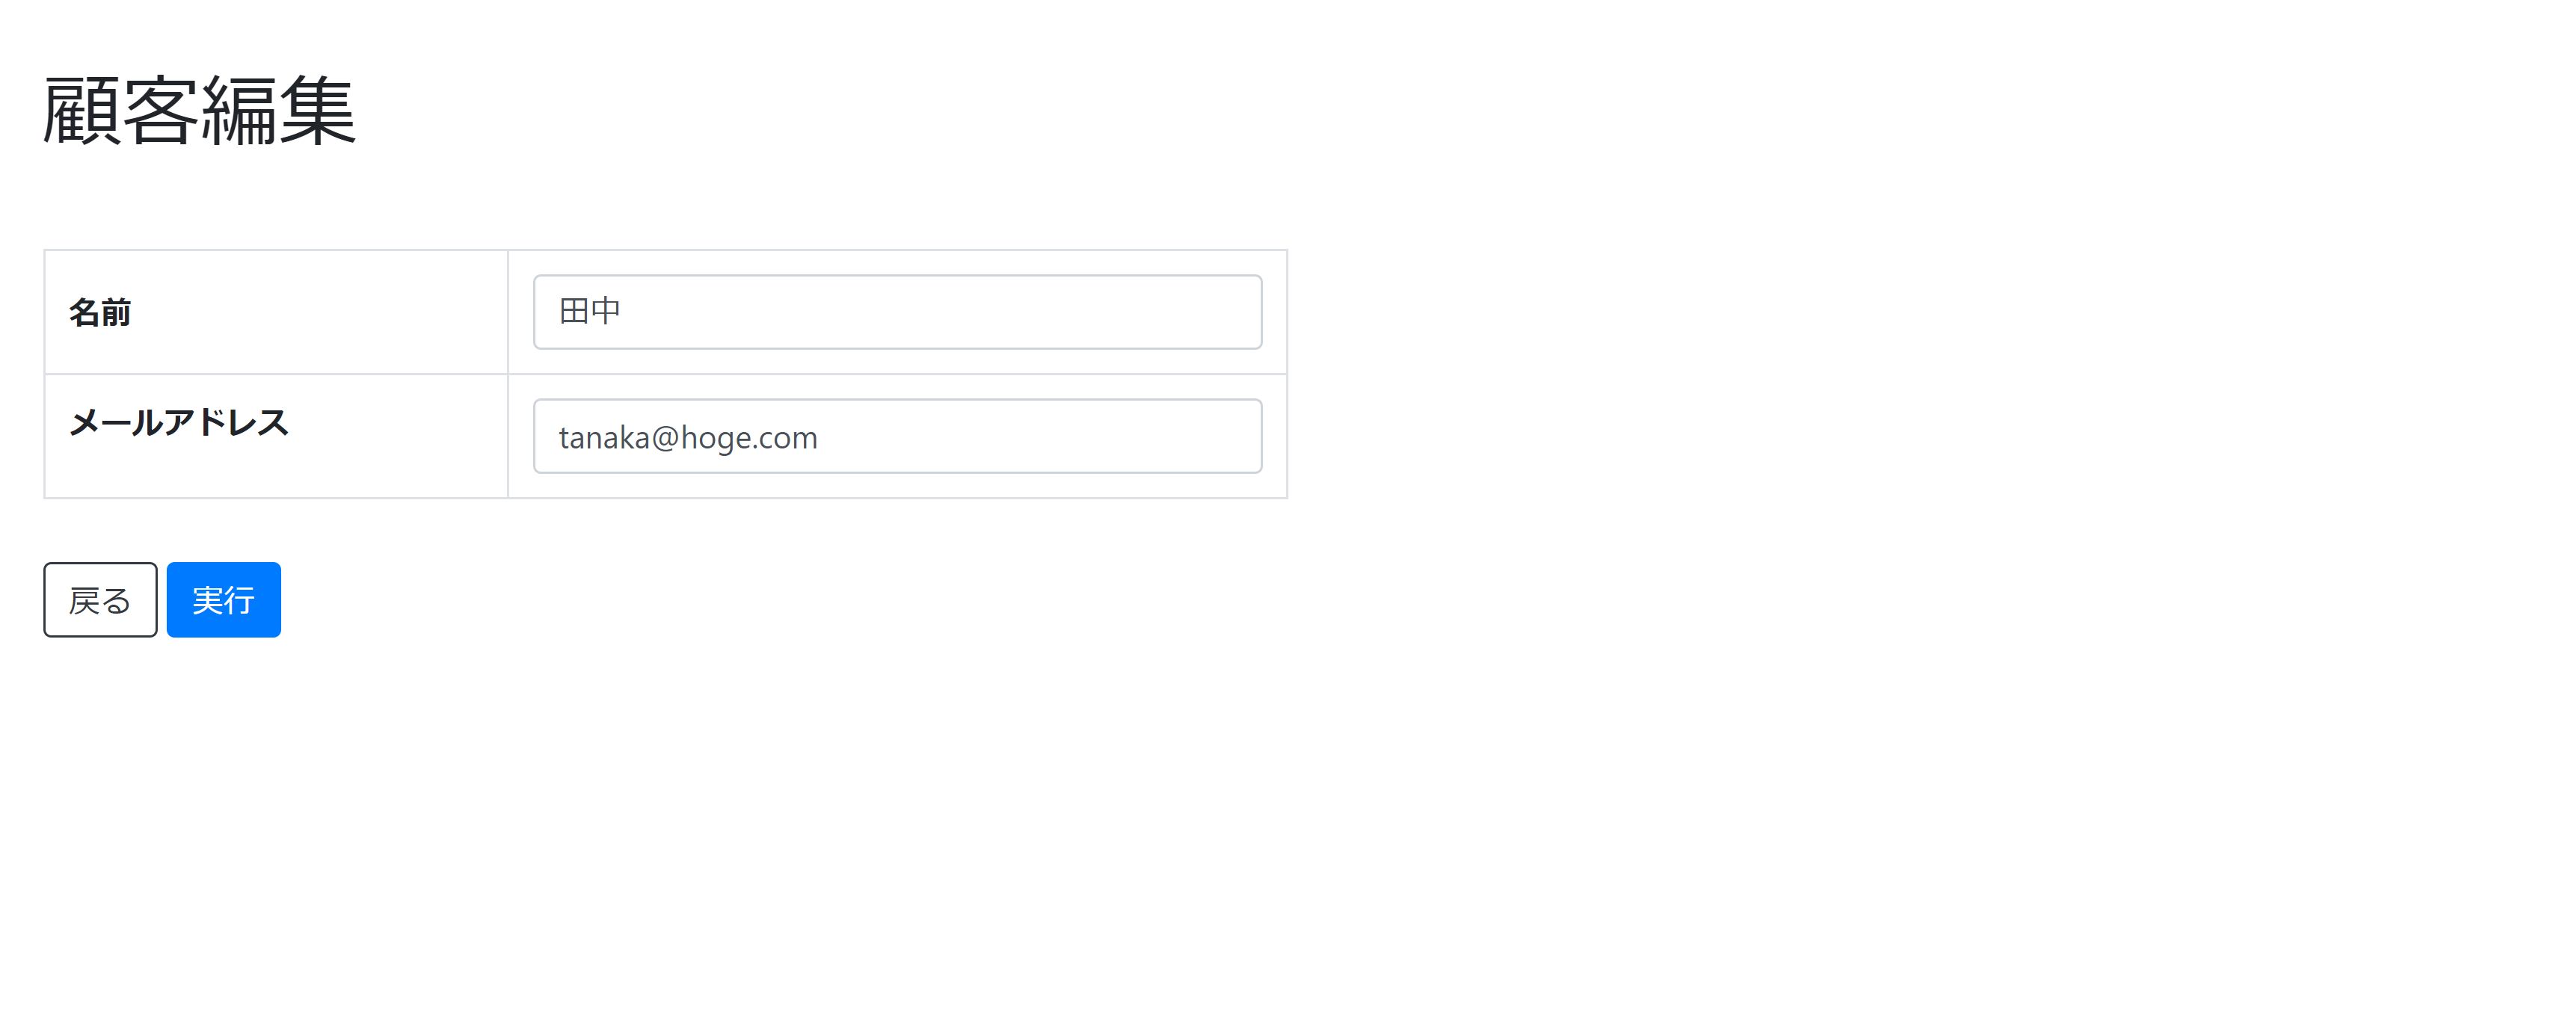
③編集画面(edit.html)の作成
<!DOCTYPE html>
<html xmlns:th="http://www.thymeleaf.org">
<head>
<meta charset="UTF-8">
<link rel="stylesheet" th:href="@{/webjars/bootstrap/4.3.1/css/bootstrap.min.css}">
<link rel="stylesheet" th:href="@{/css/styles.css}" href="/css/styles.css">
<title>顧客編集</title>
</head>
<body>
    <div class="container">
        <h1 class="my-5">顧客編集</h1>
        <form th:action="@{/edit}" th:object="${customerForm}" method="post">
            <table class="table table-bordered table-hover col-6">
                <tr class="form-group">
                    <th class="align-middle">名前</th>
                    <td><input type="text" class="form-control" name="name" th:field="*{name}" th:classappend="${#fields.hasErrors('name')} ? 'is-invalid'"><span class="text-danger" th:if="${#fields.hasErrors('name')}" th:errors="*{name}"></span></td>
                </tr>
                <tr class="form-group">
                    <th>メールアドレス</th>
                    <td><input type="text" class="form-control" name="email" th:field="*{email}" th:classappend="${#fields.hasErrors('email')} ? 'is-invalid'"><span class="text-danger" th:if="${#fields.hasErrors('email')}" th:errors="*{email}"></span></td>
                </tr>
            </table>
            <input type="submit" class="btn btn-outline-dark mt-3" name="back" value="戻る">
            <input type="submit" class="btn btn-primary mt-3" name="regist" value="実行">
            <!---------- ポイント1 ---------->
            <input type="hidden" name="id" th:value="${param.id[0]}">
        </form>
    </div>
    <script src="webjars/jquery/3.4.1/jquery.min.js"></script>
    <script src="webjars/bootstrap/4.3.1/js/bootstrap.min.js"></script>
</body>
</html>
【ポイント】
1.th:value="${param.id[0]}"
リクエストパラメーターをコントローラークラスに送信
「param.パラメーター名」でリクエストパラメーターを取得できる
※String型の配列になっていることに注意
④コントローラークラス(CustomerController.java)に編集の実行処理を追記
@Controller
public class CustomerController {
    @Autowired
    CustomerService customerService;

            .
            .
            .

    //追記
    //ポイント1
    @PostMapping(path = "edit", params = "regist")
    //ポイント2
    String regist(@RequestParam Integer id, @Validated @ModelAttribute CustomerForm customerForm, BindingResult result) {
        if (result.hasErrors()) {
            return edit(id, customerForm);
        }

        Customer customer = new Customer();
        BeanUtils.copyProperties(customerForm, customer);

        //ポイント3
        customerService.update(customer);
        return "redirect:/";
    }
【ポイント】
1.@PostMapping(path = "パス", params = "Formで付与したname属性")
2.@RequestParam 型 変数
リクエストパラメーターをマッピング
「リクエストパラメーター」と「変数名」は一致させる
3.customerService.update(customer);
編集した内容でデータベースを更新
⑤コントローラークラス(CustomerController.java)に下記処理追記
・編集画面で「戻る」押下時の処理
・削除処理
@Controller
public class CustomerController {
    @Autowired
    CustomerService customerService;

            .
            .
            .

    //追記
    @PostMapping(path = "edit", params = "back")
    String back() {
        return "redirect:/";
    }

    @PostMapping(path = "edit", params = "delete")
    String delete(@RequestParam Integer id) {
        customerService.delete(id);
        return "redirect:/";
    }
※ソースコードを簡潔にする為に、削除の確認メッセージ等は割愛